Know How Software Works On OST File
Step 1: Download, install & launch the Software.

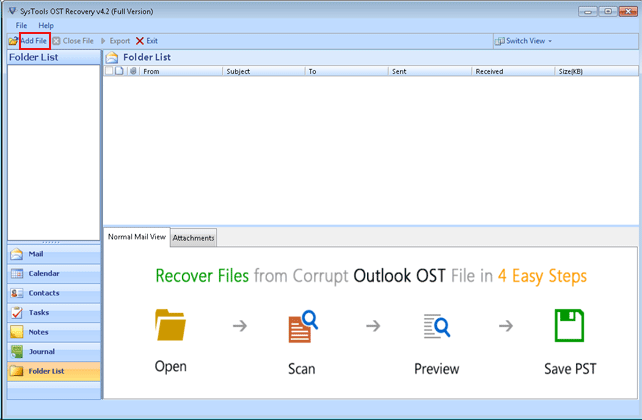
Step 2: Click on the “Add File” button to start the recovery process.
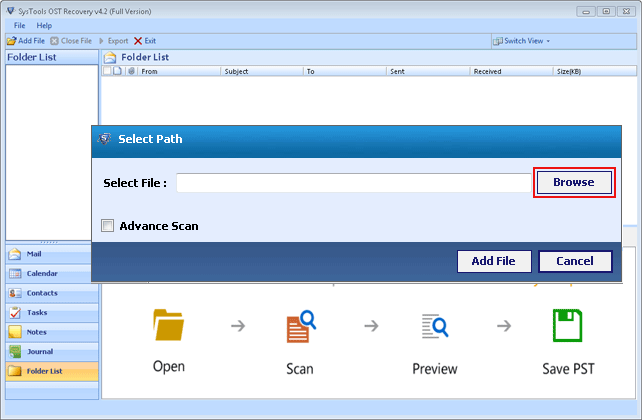
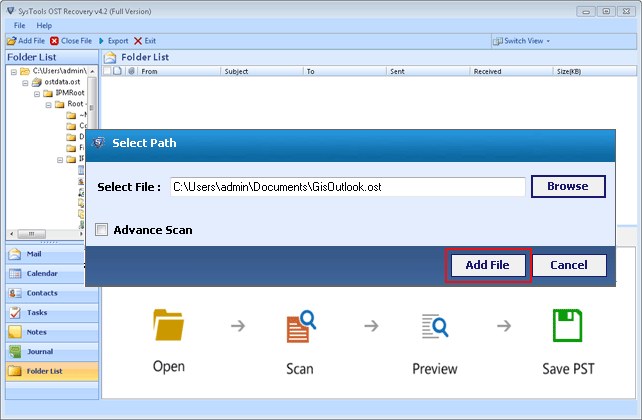
Step 3: A pop-up window will give you the browsing path for recovery file, click on the “Browse” button.
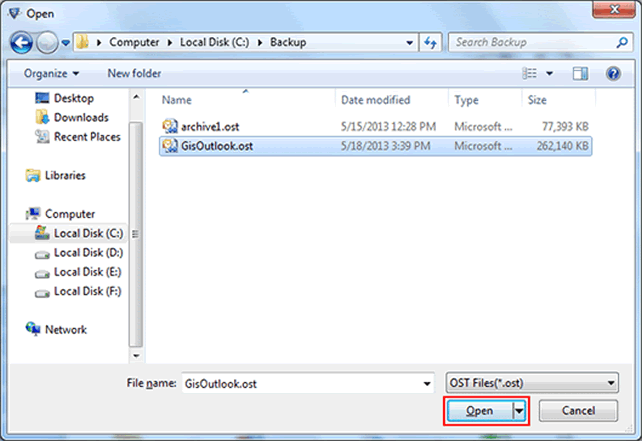
Step 4: After clicking on the “Browse” button, select the particular Outlook OST file which you want to recover and then click on the “Open” button.
Step 5: After the selection process, first check the option "Advance Scan – Tool deeply scan highly corrupted OST file", if your OST file is highly corrupted. Otherwise Click "Add File" option for normal scanning of OST File.
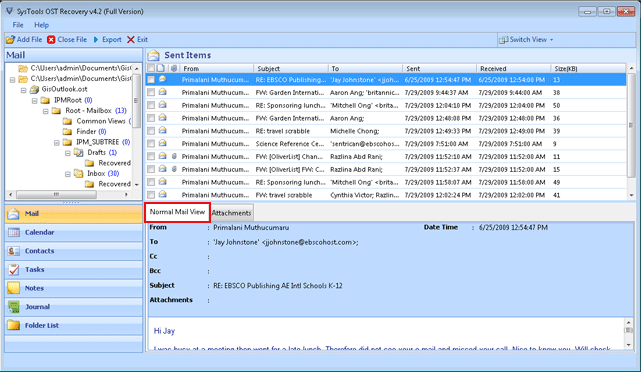
Step 6: A pop up message appears informing you that the scan is successful.

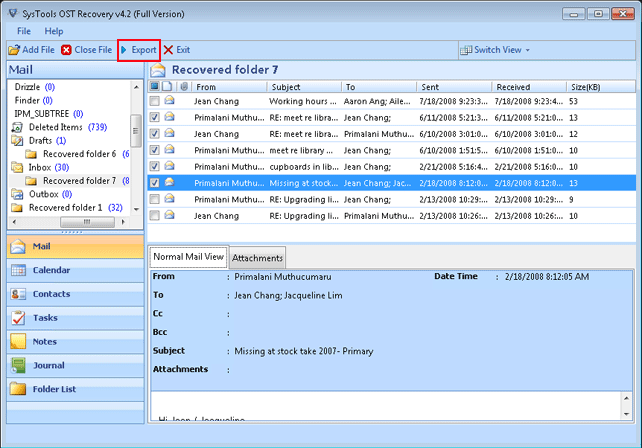
Step 7: After the completion of the scanning process, all your data will get displayed and you can preview it.
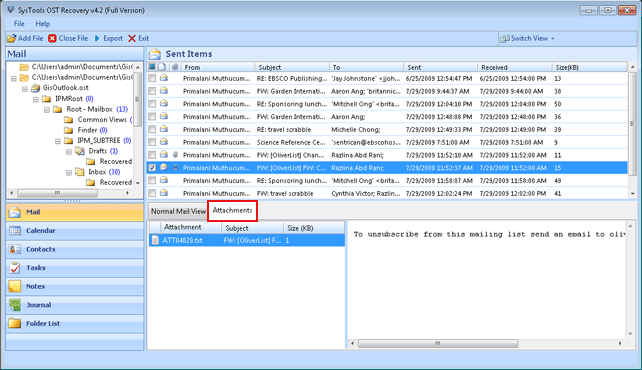
Step 8: You can also view the attachments under the attachment view option.
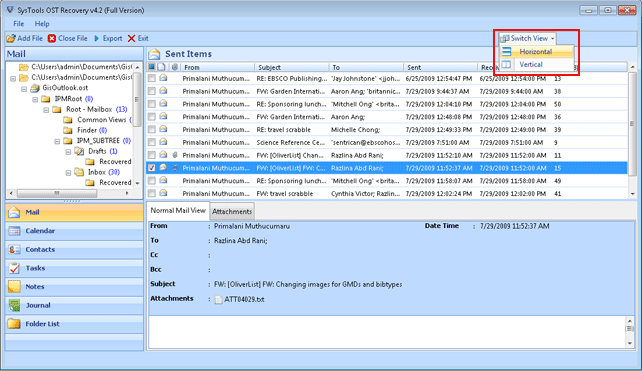
Step 9: After the scan process, you can make use of the preview styles of OST file in two way- Horizontal and Vertical. By default, preview is obtained in horizontal format.
Step 10: You can choose selected email from the desired folders to save. After selection, "right" click on it and select "Export ".

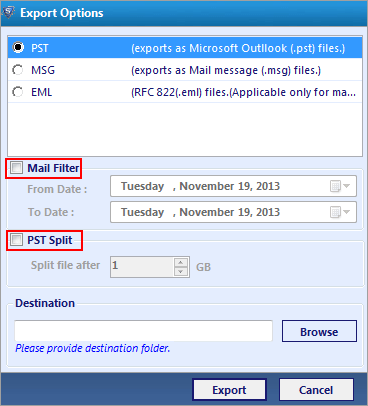
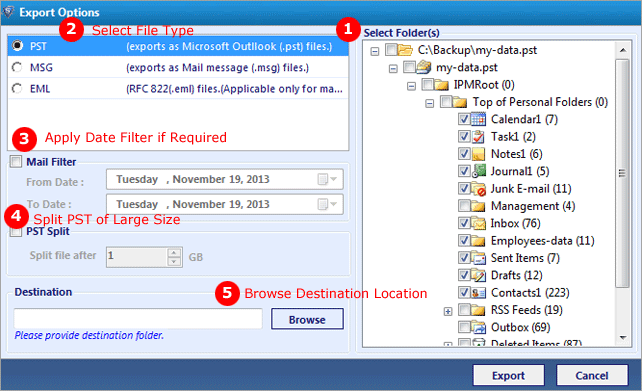
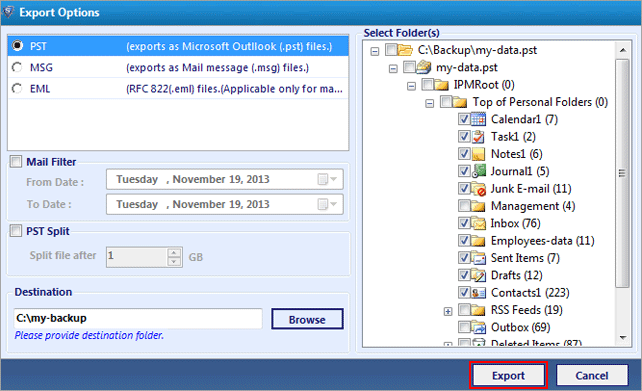
Step 11: Now select the file type in which you want to export your OST file. You have the options for PST, MSG and EML. If you go with any of the available option, then you can convert OST in your selected file format. You have other features too such as:
Mail Filter: - It allows you to export emails of specified time interval.
Split PST: - You can split large sized PST file in small sizes.
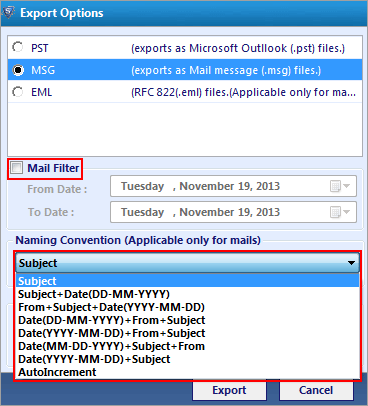
Step 12: If you are exporting your OST file to MSG or EML file type then you can also take advantage of the Mail Filters & Naming Convention:
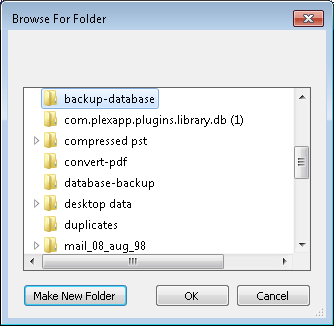
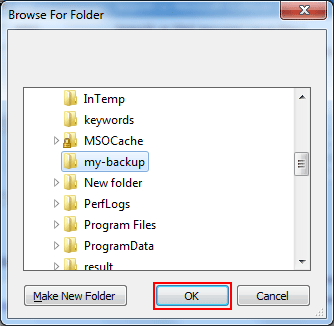
Step 13: Browse the destination folder where you want to save the resultant file by clicking Browse button.

Step 14: Browse the destination folder and click OK.
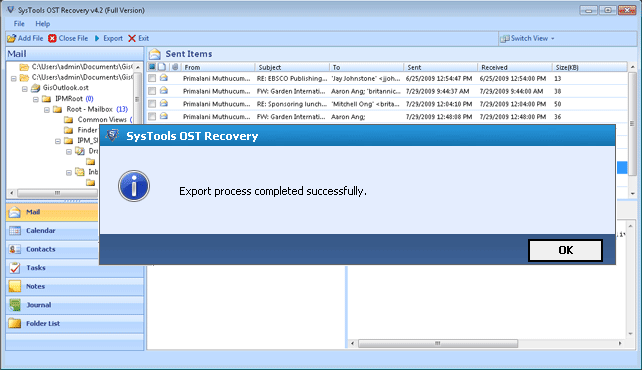
Step 15: Now click on the Export button to begin the export process.
Step 16: You will get a notification that confirms that the export process is complete. Now click OK.
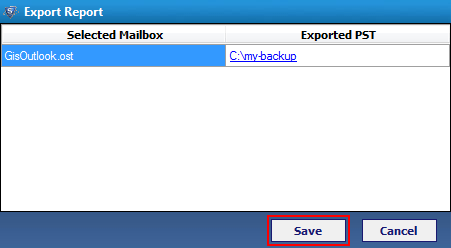
Step 17: After the exporting process is complete, automatically, a report is generated by the software. You can save the export report by clicking Save button.
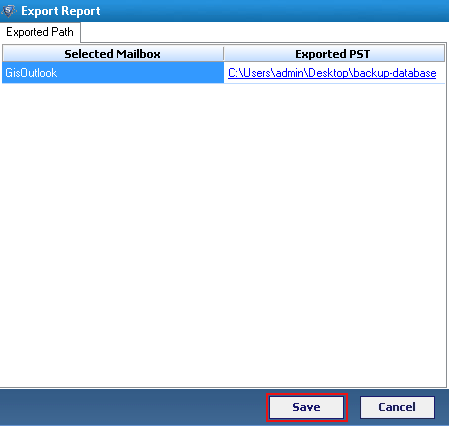
Step 18: You can save the generated .csv reort file on your machine. Enter the name to save the report. Click Save.
Step 19: You can also export complete folders. Select the folders and click Export button from navigation bar.
Step 20:Now Follow the following steps to Export folder:
Select Folder: Select the folder (mails, contact, calendar etc.) which is required to export.
Export As:Select from the file type (PST, EML & MSG) to export from OST file.
Mail Filter:Apply Mail Filter for Exporting specified dated emails.
Split PST:If the PST is selected then large sized PST file can be splitted with this option.
Naming Convention:Select naming convention for saving the name of mails accordingly (Applies to EML & MSG only)
Browse Destination:Select destination location for saving the exported files.
Step 21: Browse the destination saving location. Click OK:
Step 22: Click Export to initiate the conversion and saving process.
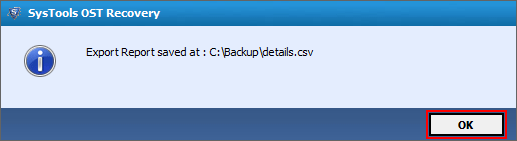
Step 23:Save the automatically generated CSV file format report on your machine.
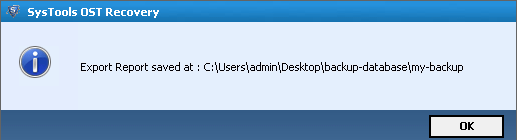
Step 24: A pop up window confirms that the report has been saved. It also shows the location ehere the .csv file has been saved.